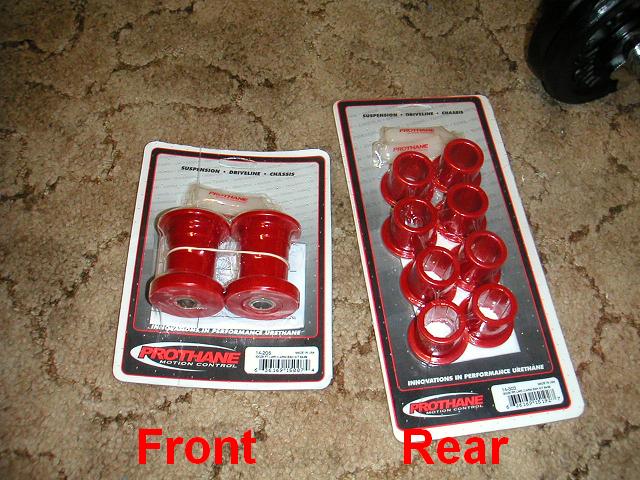
I am making 2 guides; one for the rear control arms, one for the late model tension rod and front control arm conversion (with poly bushings). The most commonly asked question about poly bushings is “what do they give you”? well honestly, quite a bit. From what I have noticed it is much easier to tell where the cars traction limits are and thus push the car to the limits more safely. This difference is most notable on race tires. The kit is available from MSA and sells for about $140. It includes every bushing for all years of Z31. I already had the sway-bar end-link and mount bushings as well as the tension rod bushings, so I just bought the rest because they sell them individually. Support MSA; their devotion is the reason the kit is even being made.
Front and rear control arm bushings:
The rear bushings replace the rubber part of the stock bushing only. They are not a "complete" bushing as the OEM’s are; rather they use the OEM inner and outer metal sleeve and replace the rubber. You have to remove the rear control arms to take out the bushings. I tried drilling, but honestly, the only good way to get out the old bushings is by burning them out. Removal of the rear control arms is not hard at all, however they are heavy and the mount bolts are frequently seized. This would be the first thing to check before even buying poly bushings; if the bolts are stuck even with the use of a penetrating oil, plan on pulling the rear cross-member and using heat and a lot of force on them.
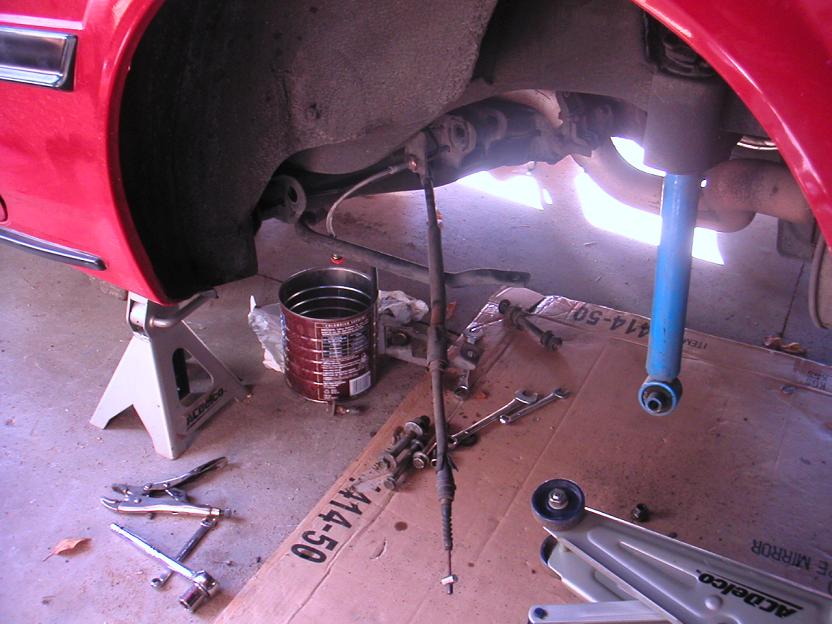
The control arm removal is simple, start by jacking up the back of the car (use jack-stands!). Then remove your rear wheels and tires. Next loosen the rear control arm mount bolts; this, as stated, is the biggest challenge of the rear installation. Take note of the placement of the inner toe adjustment bolt, or even use a paint pen to mark its location so toe can be close to spec upon re-installation of the arm. Once you have them loose, remove the rear anti-roll bar end-links. Then disconnect the parking brake turnbuckle, it is by the rear u-joint of the driveshaft. Then remove the parking brake cable from the caliper, the parking brake cable mount unbolts from the arm next (but you don't HAVE to unbolt it). Disconnect the shock damper at its lower mount, I find it easiest to put a jack under the control arm and lift a little so you can pull the bolt straight out. The coil spring can now be popped out easily.
Pop the half-shaft from the diff with a wrench or something; you just have to lightly pry in right next to the diff, but trying not to damage the seal. The lug wrench in the spare tool kit works well for this. At this point the control arm is ready to come off. I found having a short stool under the control arm helped as I could wheel it out from under the car easily once removed. Wrap some paper towel or something around the splines on the half-shaft.
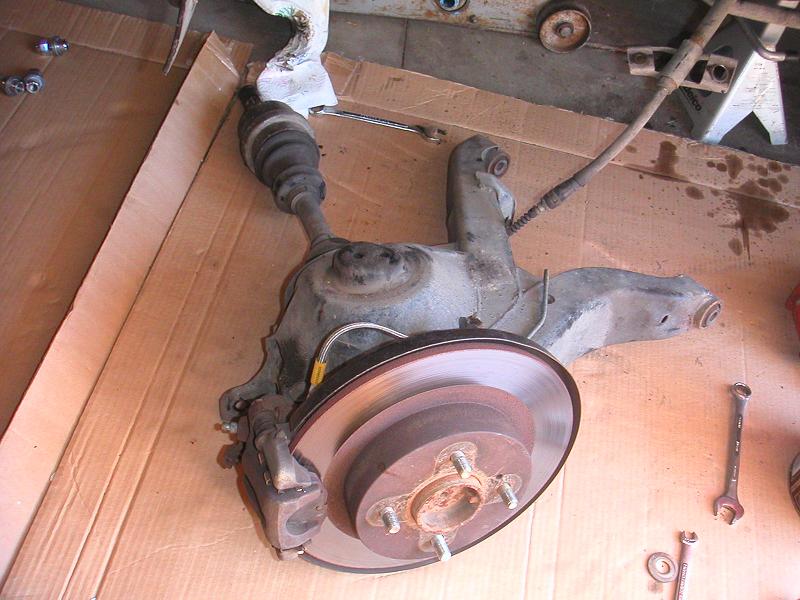
Here is a look at an arm (and everything attached to it) outside of the car:
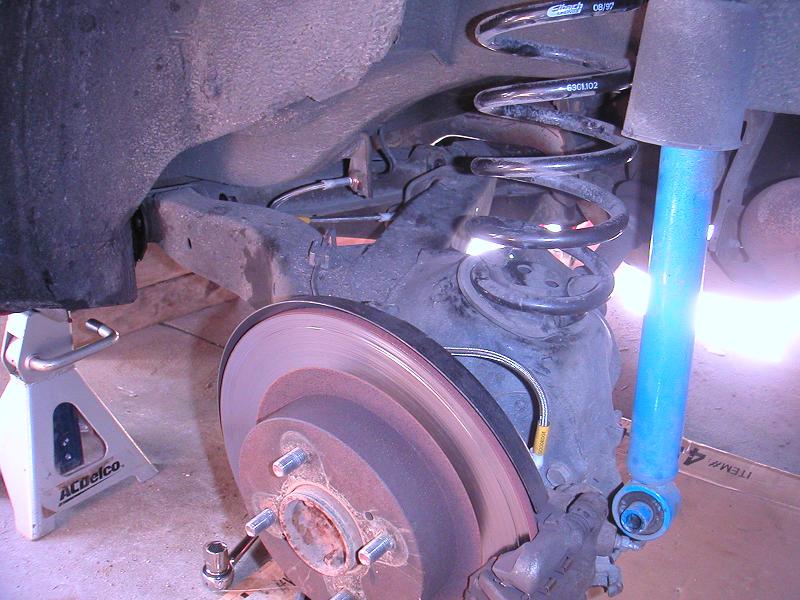
And what it the car looks like with no rear arm (if you have never taken a good look at your suspension setup, seeing it torn apart makes it a lot easier to understand how things go together.
Next, take the control arm(s) somewhere where you can create a bunch of noise or smoke or both. As I said you CAN drill the bushings out. I drilled the first one out on mine and it took over an HOUR for ONE bushing. Not exactly fun times, I have to say burning them out is the only way to do it. The best way is to get the outside of the bushing really hot (if you heat the inside then all the rubber will be left inside the outer sleve and it is far harder to burn it out that way). That way when it is finally melting, the inner sleeve takes most of the rubber with it. It is much easier to burn it off the small inner sleeve outside of the control arm, than the inside diameter of the control arm itself. Case in point:
Propane worked, but took a long time. I did not have access to an Oxy Acetylene torch (which may have overheated the metal anyway) so I bought some MAPP gas, this is available at any local NAPA, CarQuest, etc, etc. The MAPP gas worked wonders; in less than 30 minutes I had both bushings on the second control arm burned out (compared to about 3 hours of drilling and burning with propane on the first).
At this point you should have the rubber burned out of both control arms (all 4 bushings total). The inner sleeves should look something like this:
The best thing I found to clean them up with is a scotch-brite pad, they won’t groove them like sandpaper, and get them looking nice and clean quite quickly. Next make sure the inside diameter of the holes on the control arms are cleaned out. For this I used sandpaper and a dowel (broomstick) worked nicely (using sandpaper here is not a big deal, as the bushing is not going to be moving against the metal, but rather, with it).
Next clean the inner and outer sleeves off with something; I used brake parts cleaner as it tends to take anything and everything dirty off. Make sure no residue at all of any cleaner you use is left. Now it is finally time for the bushings to be taken from their home on the cardboard. Note that they all look the same but are not all the same. The inner bushings have a larger internal diameter, the instructions explain which bushing goes where so I won’t get into that here. (Note: some cars have outer bushings that are the same as the inner bushings, Prothane will gladly correct this issue if you have one of the kits with the differently sized bushings.
The most important step now is greasing. Make sure the little grooves on the inside of the bushings are completely filled with the grease provided. This IS a special kind of lubricant made for poly bushings, you should not substitute anything else. Also grease the insides of the control arm mount brackets (on the cross-member). If you choose not to do this step well, you will only be angry with yourself when they squeak after 2 weeks of being in the car (I speak from experience). This is VERY sticky stuff so don’t go getting it all over your hands and tools like I did..... Brake cleaner takes it off.
Grease and assemble the bushings before inserting them into the control arm. Then, push them as far as you can into the holes (which should be all the way if you cleaned them out well). Then insert the center “inner sleeve”, it should go in with relative ease, if not something is wrong. If it is just a little too tight to push in by hand, a large c-clamp will work nicely.
And now you have the new bushings installed in your rear control arms, good job. Now all that is left to do is put the arms back in the car, which is only about 4 times harder than removing them. I used a small caster stool to set the arm on as I re-inserted the half-shaft; it helped quite a bit in aligning the arm to the mount holes as well. Simply re-assemble the rear suspension the same way it came apart. In order to re-install the shock damper it is easiest to jack on the control arm once you have the spring in place. After a little while (50 miles or so say the directions) check to make sure your mount bolts are nice and tight. You’re done, Enjoy.
Note: I am not to be held responsible for any persons injury or property damage pertaining to the use of this FAQ to install their bushings. By reading this you admit I have no liability whatsoever.